UPDATE: Enabling zero cache on some boxes can cause issues. The cache is supposed to empty automatically but sometimes it does not. If it fills up completely, Kodi becomes unusable. Use at your own risk. All boxes sold after April 5, 2015 will now have zero cache disabled.
If your videos are constantly buffering this can be due to a poor internet connection. However, sometimes even a good internet connection will have buffering issues.
All units sold after March 2, 2015 have the “zero cache” fix enabled. If you purchased your Android box before this date, you can try enabling zero cache.
Enabling zero cache enables your box to download much larger portions of the video at a time. While this doesn’t solve speed issues, it does mean you can start a show, pause it for a few minutes and then watch it assuming it’s downloaded enough. Without zero cache, the show downloads to your computers RAM (memory). There is generally only a small amount of free space in your RAM, so it only buffers a very small amount.
In the picture above, the light grey represents the amount of the video downloaded. Without zero cache enabled it will never buffer more than this. This means that the downloading of the video may not be able to “keep up” with the playback so the video will pause every few minutes to buffer some more.
When you enable zero cache, it forces the unit to instead download the video to the storage of the device, instead of the RAM (memory) and your storage device has plenty of room for this.
So after you’ve enabled zero cache and you pause your video for a few minutes, you’ll see it will download significantly more than before. If you wait long enough, it will download the whole video.
This way, even with a poor internet connection or poor sources, with a little patience, you can still watch the video.
Follow these steps to enable “zero cache”.
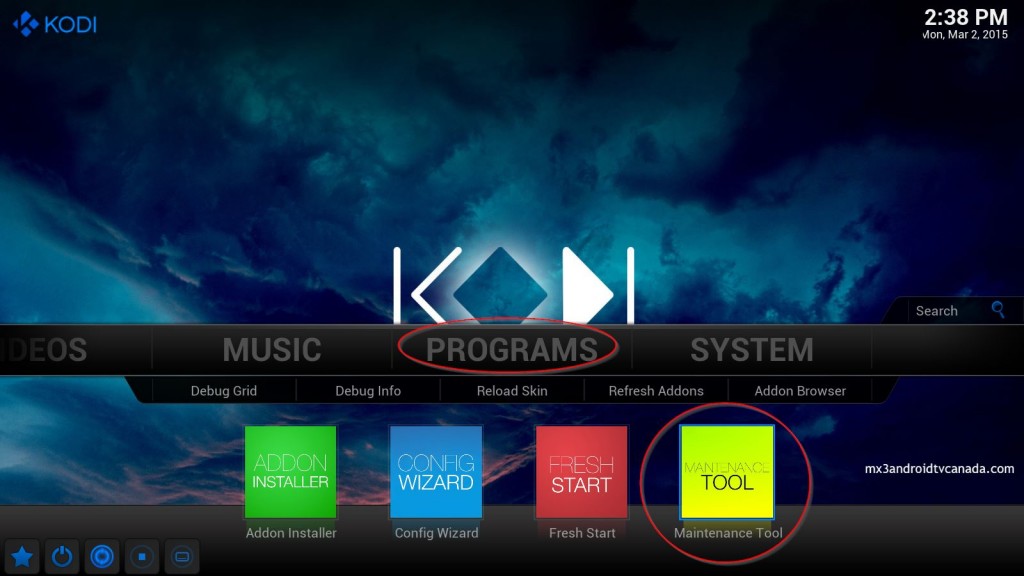
Go to Programs and then select “Maintenance Tool
It will likely popup with a window with some information. Just hit OK.
Navigate to System Tweaks and hit OK.
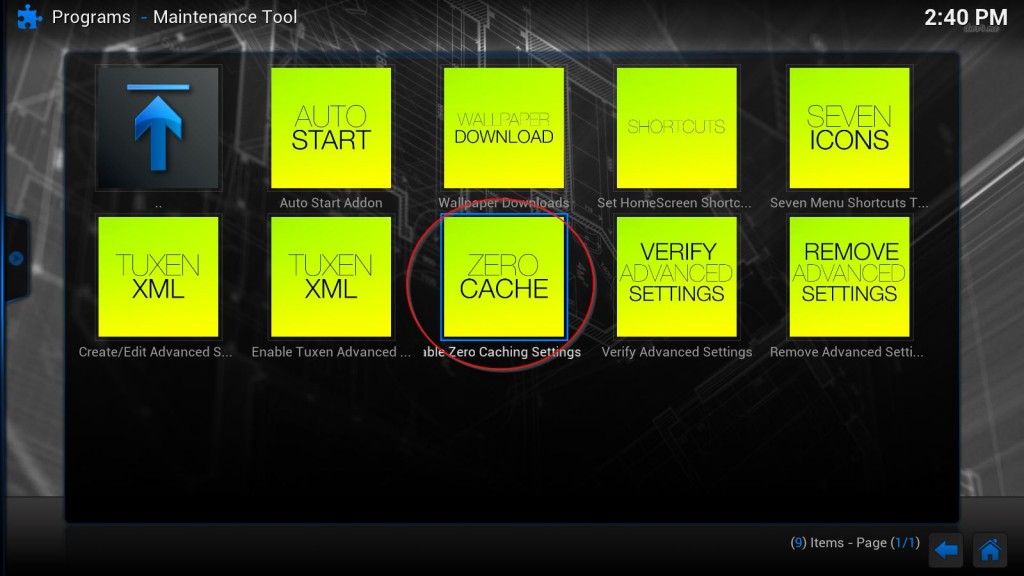
Navigate to the “Zero Cache” icon and hit OK on that.
You’ll be warned that you are you should backup your advanced settings. Since you actually don’t have any advanced settings at this point, it’s not necessary to backup, so just hit “Yes”
You’ll get a confirmation that it’s done. Hit OK.
Zero cache is now enabled for your Android box!


